Raspberry Pi Controlled Codebug With I2C
Introduction
Connecting CodeBug to your Raspberry Pi can unleash it’s full potential. Your programs can:
Make CodeBug respond or control Minecraft
Display your Tweets on CodeBug
Control CodeBug from hundreds of miles away remotely over the web
Turn CodeBug’s LEDs on and respond to its buttons
Create games, and anything you can imagine, and program in Python
Hook up with Internet of Things devices
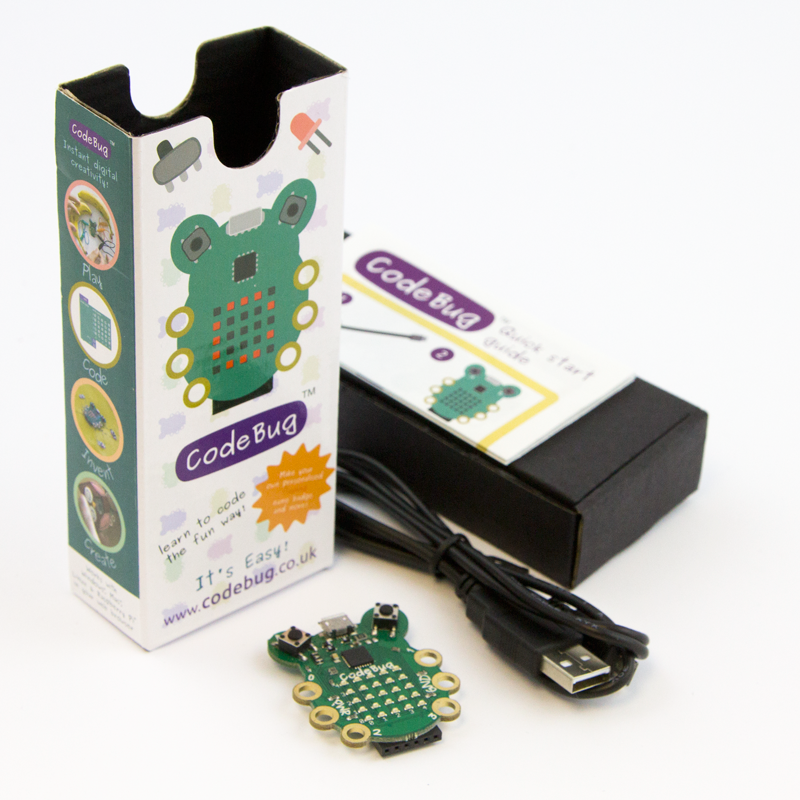
CodeBug tethering works by putting a special project file onto your bug and plugging CodeBug onto your Raspberry Pi’s GPIO pins.

|
CodeBug | |||
| Micro USB cable | ||||
| Raspberry Pi | ||||
Set up Tethered mode
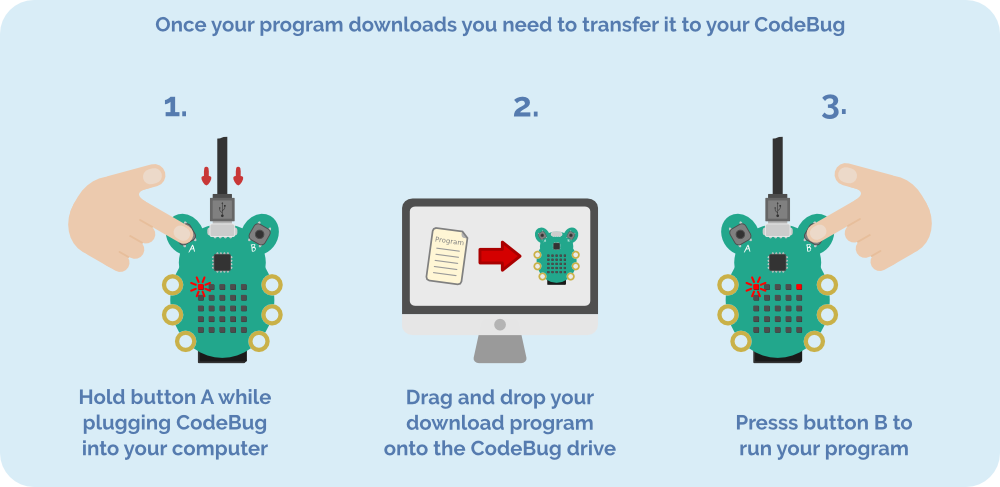
For Tethered mode you need to load your CodeBug with a special project file. This is downloaded to CodeBug just the same as a regular user program (refer to the download guide for details).
Download this I2C Tether mode project and load it onto your CodeBug.
Fitting CodeBug to Raspberry Pi
Look out!
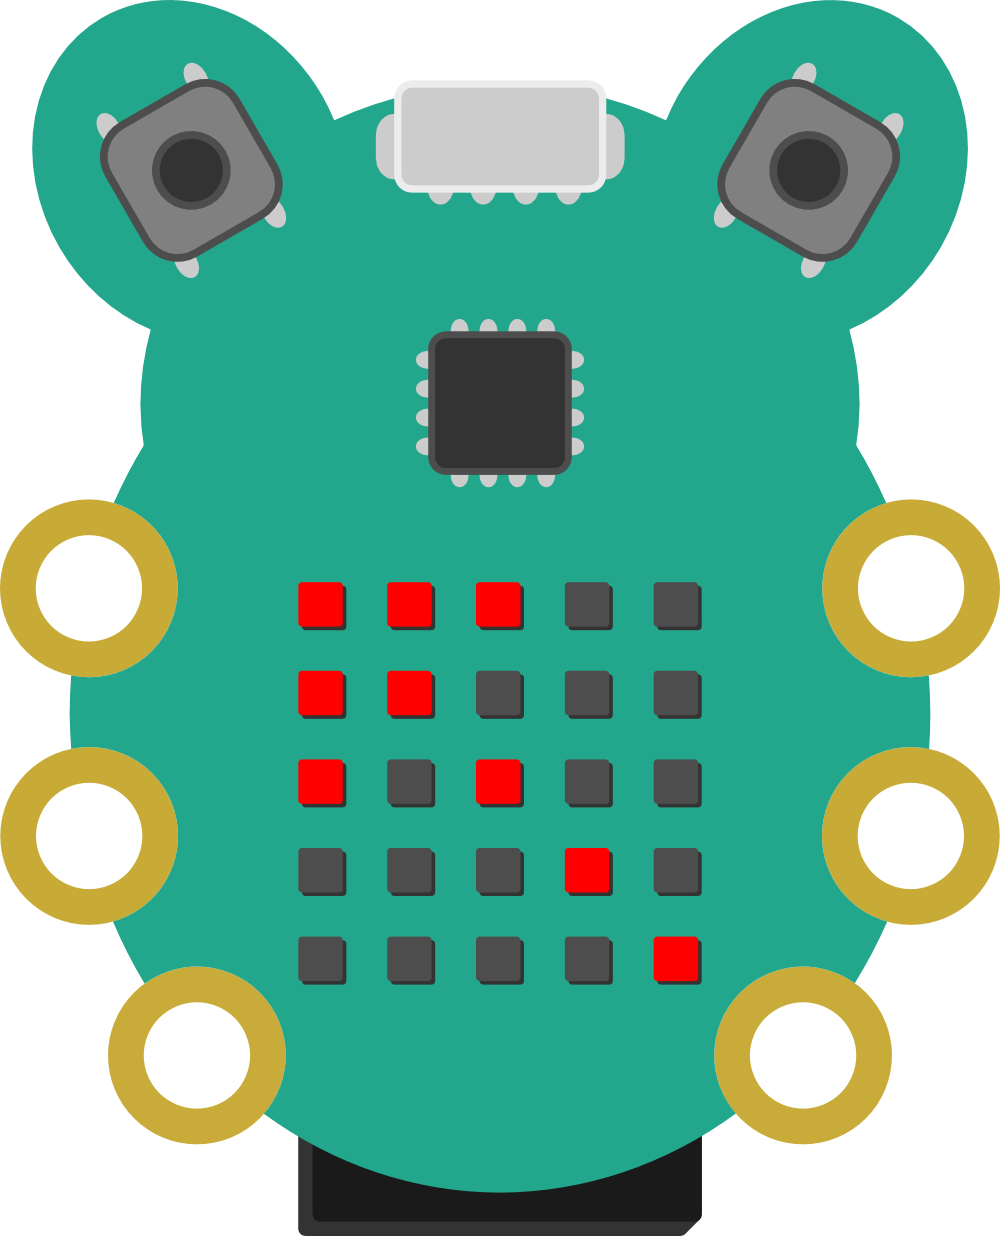
Never connect the Micro USB or use a battery with CodeBug while it is fitted to a Raspberry Pi.CodeBug connects straight to Raspberry Pi’s GPIO header through CodeBug’s expansion connector. While your Pi is disconnected from power, align CodeBug to the pins shown in the diagrams below and gently push CodeBug’s connector onto the GPIO pins.
Choose your matching Raspberry Pi model
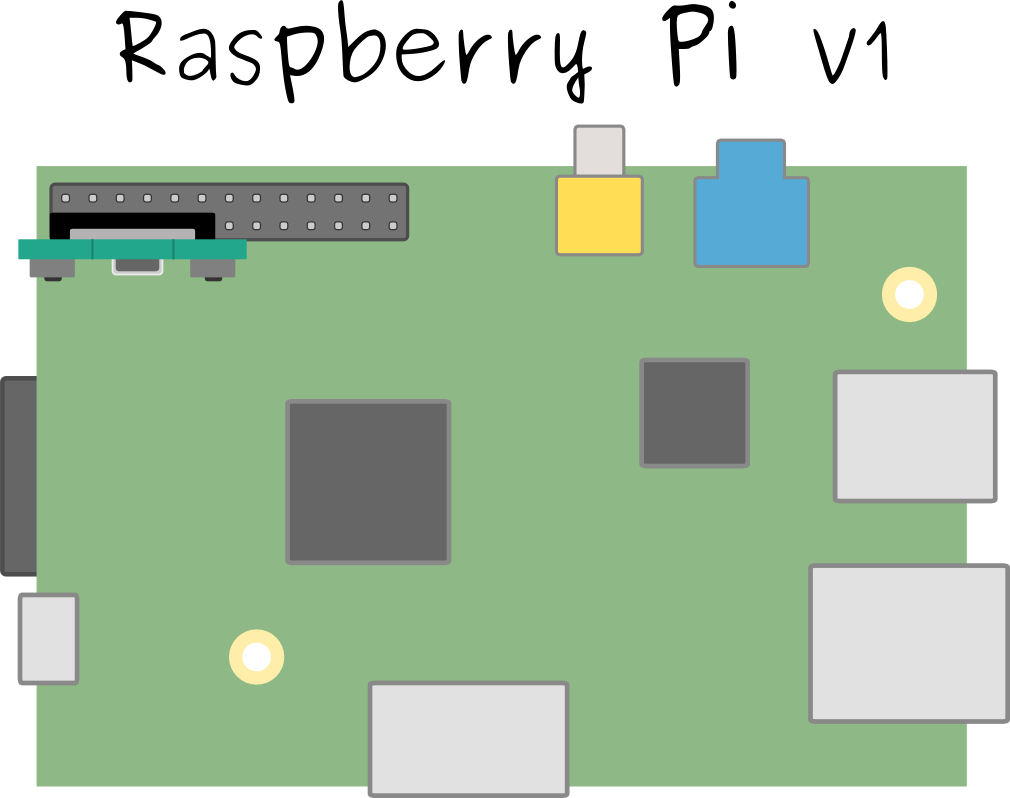
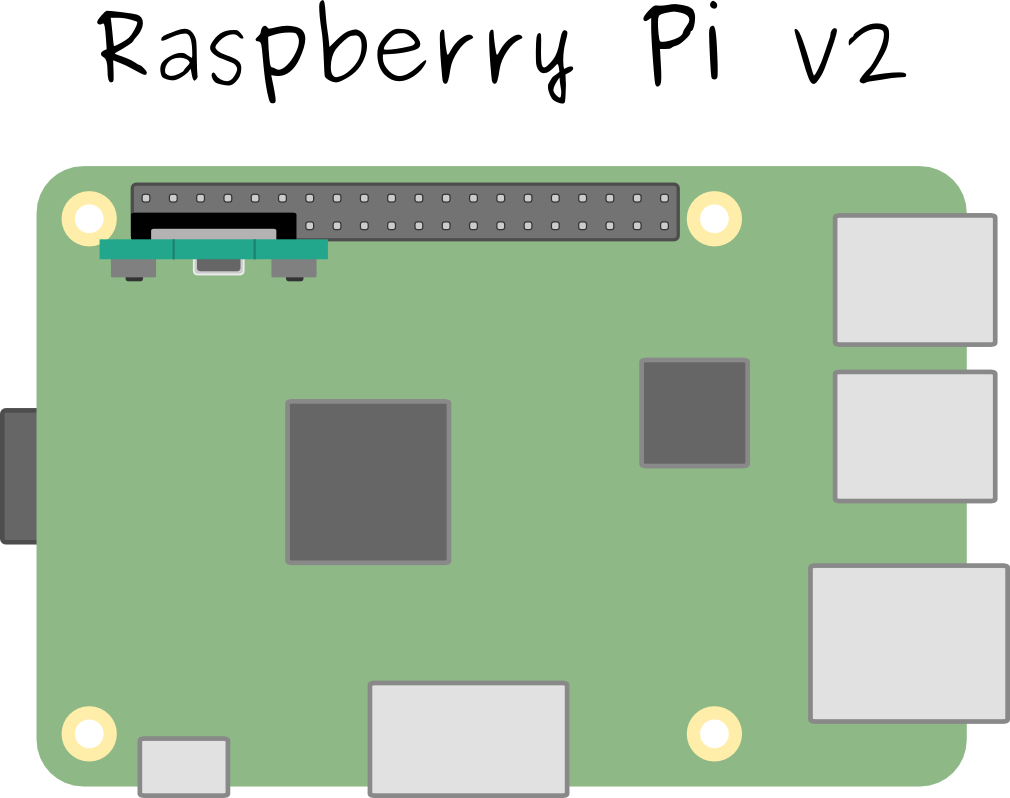
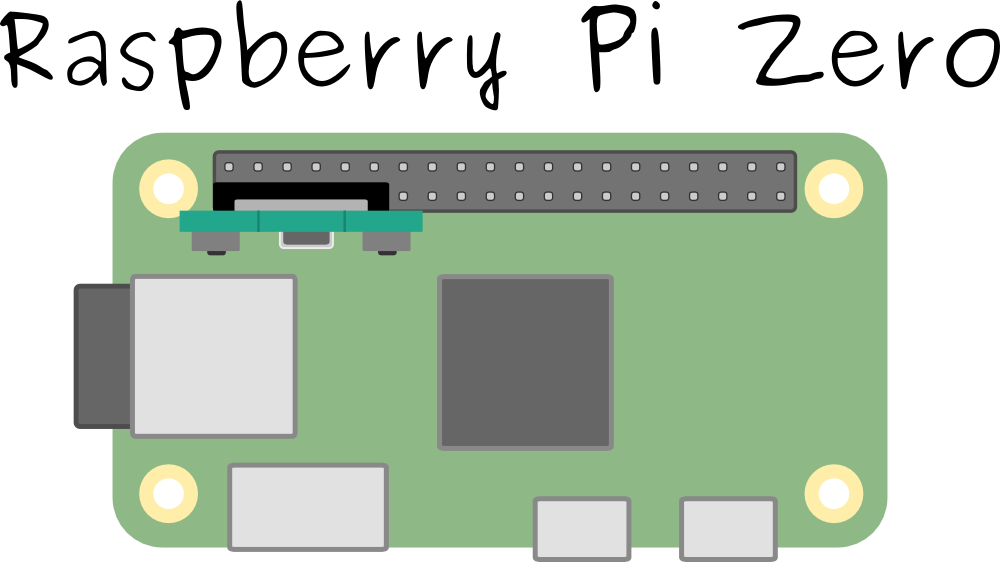
If you are still unsure which Raspberry Pi GPIO pins to connect CodeBug to, note the pin labels on the back of CodeBug, and connect these to the corresponding pins on your Raspberry Pi.

You can now power up your Raspberry Pi.
Enable Raspberry Pi I2C
First, make sure you have enabled I2C by opening a Terminal window and running
sudo raspi-configAnd then choose
Advanced Options > I2C then select Yes for both questions.
Python libraries for Raspberry Pi
You must now install the Python libraries that will talk to your CodeBug using the I2C GPIO pins.
In your Terminal window, type
sudo apt-get update
sudo apt-get install python3-codebug-i2c-tether
Test with an example
Download this example to your Raspberry Pi (right click Save Link As…)
Run the example your Terminal with the following command
python3 example.pyYou will see an arrow pointing up-left on your CodeBug’s LED display!
Creating Tethered CodeBug programs
You can write your own Tethered CodeBug programs using Python and a few simple commands to control your CodeBug. In the next steps you will start an interactive Python session and enter commands to interact with your tethered CodeBug.
Open a Terminal and type
python3You will see the python prompt appear >>>. Now import the CodeBug I2C library by entering
import codebug_i2c_tether

cb = codebug_i2c_tether.CodeBug()

cb.open()

cb.set_pixel(2,2,1)
You will see the center LED light up on CodeBug.
Try setting a row of CodeBug’s LEDs at the same time
cb.set_row(3,0b10100)You will see the third row of LEDs light up in the sequence you gave. 0b10101 is a binary value. The 0b shows that it is binary and the 10100 determines which LEDs are on. 1 represents on and 0 represents off. This means that the LED to the far left is on (column 0), the next LED is off and the next on (column 2), and the other two LEDs are off.

Write text on the CodeBug’s LEDs, using the command
cb.write_text(0, 0,'A')An A will appear on the CodeBug LEDs
To write scrolling text on the CodeBug’s LEDs, first import the time module:
import timeYou can now scroll text using the commands:
for i in range(0,-30,-1):

    cb.write_text(i, 0, 'Hello', direction="right")

    time.sleep(.1)
The text "Hello" will scroll
Check whether a button is pressed, by giving get_input either an ‘A’ or a ‘B’ or numbers 0-3.
cb.get_input('A')This will return True if the button is pressed, otherwise it will return False.
Press Crtl D to exit Python.
What next?
You can get a full list of the commands available by typing the following into your interactive Python shell, with the codebug_i2c_tether library imported.
help(codebug_i2c_tether.CodeBug)Write long programs for Tethered mode CodeBug by writing commands in your text editor and saving and running the file in the way you did with the examples earlier, (python yourfile.py).
Tethered mode gives your CodeBug access to the full computing power, functionality and network connectivity of your Raspberry Pi! Make the most of the variety of powerful yet easy to use Python modules allow your CodeBug to generate random numbers, create email alerts or even post to Twitter!